Tuesday, May 27, 2008
Ye Olde SX-70 Magick
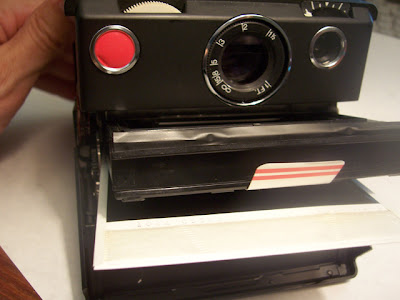
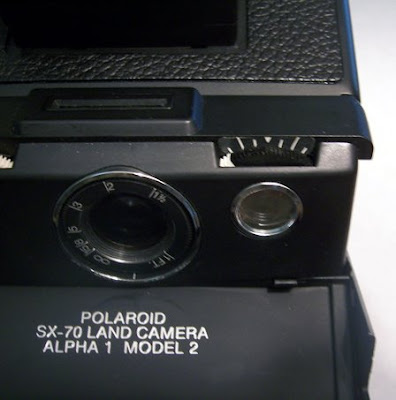
I debated about doing this post, as there is a lot of info about Polaroid's SX-70 camera on the Web already... I figure a lot of this is redundant. But, what the heck. I still see tons of questions on forums and flickr and such about the cameras and using 600 film in them, so maybe this will help one or two. Plus I can show off how pretty my SX-70 is now. And it obviously shoots out cool Pink Floyd laser beams, as you see in the picture above, so that's worth another interweb article.
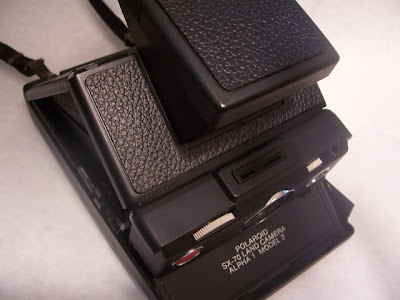
I got my Alpha 1 Model 2 on eBay for a decent price. I was really patient and waiting for just the right "buy it now" deal. And it came with some flashbars, which are kind of expensive as an individual item. I chose this particular model just because it seemed to have more nice words said about it on the Web. Born in 1977, it was the one of the final folding non-Sonar models, and just seemed to have the best combination of features: split-image rangefinder, a distance scale on the focus wheel, tripod socket, built in clips for a strap, and fill flash capability. I know most people prefer the original, but whatever. I didn't want to spend $200 for an SX-70, either, with fewer features. And some people say, well, the original is metal so it's better. Sorry, still plastic, it's just plated with metal. Get over it.
So, one of the 'features' of my camera was the Porvair covering. This is a fake leatherette that is moderately ugly, and mine was beginning to rot and flake.
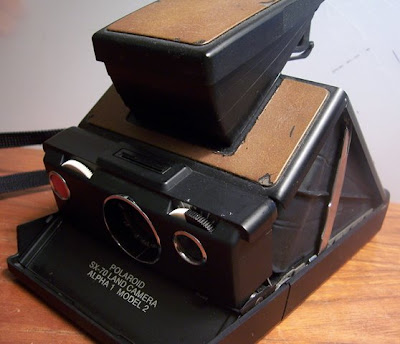
It certainly gives it a nice 1970s vibe (sans fake woodgrain), but I decided that since the rest of the camera was in near perfect condition, I wanted to dress it up a bit. I ordered a new skin from aki-asahi. Good service, fast overseas shipping. I couldn't really find anyone else who makes these (besides making one myself, but I didn't want to hassle with it), but the price was good and they did good by me overall.
When I got the package, I was like, wow! They sent me a free skin!
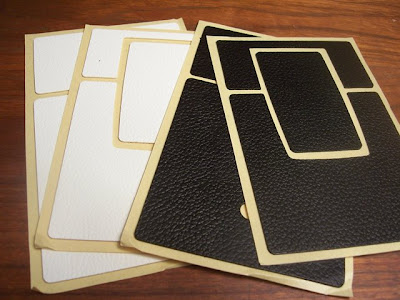
Well, the white skin is labeled 'for practice'. The process is so simple, though, I didn't use it, so I have a white covering if I ever want to use it.
Pulling of the old skin was a pain...in the ass. Sure, it looks like it is flaking off and hey, maybe it will just fall off. That flaking is only on the surface. The full skin is really, really stuck to the camera. Getting up a corner to pull was tough enough, and then it kept breaking off in little pieces. And that brown surface just flaked off into dust. It was pretty gross. I probably have Porvair disease now from breathing it in. But I did eventually get it all off. I didn't take any pictures just because it was too messy and nasty.
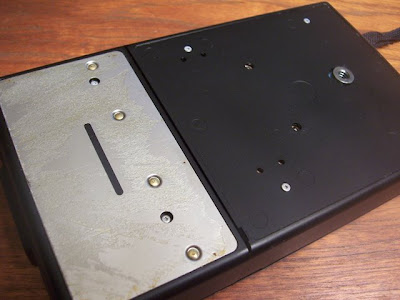
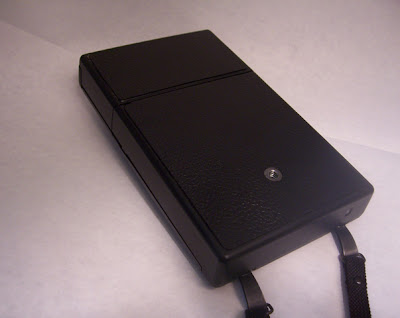
Here are some sexy pictures of a naked SX-70. You might want to move the children to another room.
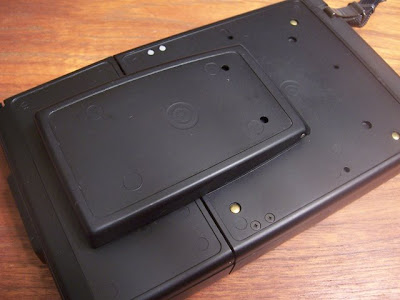
Okay, you can open your eyes again. I cleaned that hard glue off the bottom metal plate with rubbing alcohol. All the directions are on the aki-asahi site, so I didn't really have to put much thought into the process. I got the new skins on in about five minutes, let it dry for awhile and viola! Sexy new SX-70. I love you SX-70, you make me hot.
Like converting a Gremlin into a Porsche.
So, okay, I've talked a little bit about this before, but what exactly do I use in my SX-70? It was originally intended to use Time Zero film, which hasn't been readily available since I think 2004. And now it costs upwards of $50 a pack on eBay (Edit: I'm seeing a 5-pack go on eBay for almost $500. That's just stupid). I had to make 600 work in my SX-70. That's what kept me from getting one for awhile, because it just all sounded so complicated (and I'm actually fairly lazy, believe it or not...that's why I don't own any complicated TLRs with lots of buttons and knobs and switches and such). The problem is that the exposure for Time Zero is much greater than 600, so you blow out the image when you use 600. It is waaaay overexposed.
Well, you have a couple options. You can go the complicated route, which is an internal electronic modification to adjust for exposure. Some say this is the only 'true' way to achieve optimal photo exposure and quality. It wasn't something I wanted to mess with. Vague directions about replacing the capacitor can be found here.
The second option is to reduce the amount of incoming light with filters. You have two options here - to fit a 2-stop neutral density filter to the lens, or fit a filter to your film pack. The SX-70 Blend film that was recently available on unsaleable was probably just 600 or 779 (there is an ongoing debate about which film they used), and they stuck a dark filter over the opening on the pack. You can also buy filters for your pack on eBay and somewhere on the Web. There is a Japanese company that makes them. All this does is, like I said, reduce the light that hits the film, preventing overexposure. The advantage to this method is that you can still have full use of the light/dark dial to tweak exposure. The downside, for me, is that it just feels...unnatural. Yeah, I know, who cares, it works - but for some reason I see placing a dark piece of plastic in front of your Polaroid as not quite right. I can't even really explain why I feel this way. It's just not for me. I want the purity of natural color, if that makes sense. But it's the most common way of dealing with 600 film in the SX-70.
So the other option is to do a minor modification to the camera, which was my route. This site does a great job of explaining the process. And he actually does the mod and uses an ND filter on the front of the camera, so you can see how both work.
Now, one step I totally avoided was the cutting up of a CD case. This is not an easy task...and it's a bit thicker so it doesn't fit quite right. I just used a piece of clear acetate, like you buy in sheets at an art store. All you are wanting to do is make a cover to keep the dust out, and acetate is thick enough that you would have to try to poke it out with a finger, yet thin enough that you can just cut it out with scissors. Here is the old filter and the clear acetate over the opening.
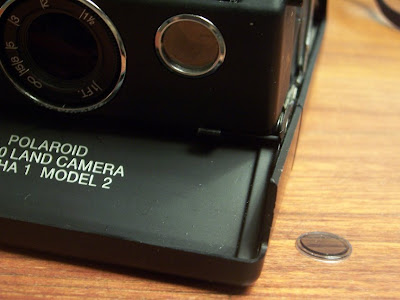
Simple enough. So this kind of changes the way the camera automatically adjusts for exposure. But, you can't just open the cover and shoot. To prevent overexposure, you need to turn the light/dark wheel to the dark side. You have to do this every time you open your camera, as it will reset to the middle when you close the camera.
Sounds like kind of a pain to remember to do this, but opening up the camera is a project in itself, so it's just another small step. I don't think I've forgotten more than twice. Of course, the downside to this method is that you don't have full range of exposure tweaking control. You can tweak moderately in the darkened range. Here you see what happens if you leave the dial centered as opposed to all the way to the dark side, late in the day but sunny.
So you can tweak in the range, with a variety of results. It's just much more sensitive to adjustment, as the dial range is much smaller. Also, the light you are shooting in makes a big difference. Because of its propensity for overexposure, the camera does quite well in shade, with richer and truer colors.
Though it's just as worthy, and perhaps prettier, to use it in interesting lighting situations, like a bright sunset.
The other trick you need to do to use 600 in an SX-70 is to make the pack fit in the camera. This isn't nearly as difficult as it sounds. They are the exact same shape. The only difference is that 600 packs have tabs on the bottom to prevent them from being accidentally used in SX-70s (as both film types were available for quite awhile).
Some people like to cut all these little tabs off to make the pack slide into the SX-70. An easier way is to just stick something under the pack, say an old Polaroid or that black sheet that pops out of the pack, until it slides over the sticky point, then pulling the sheet back out and pushing the pack in the rest of the way.
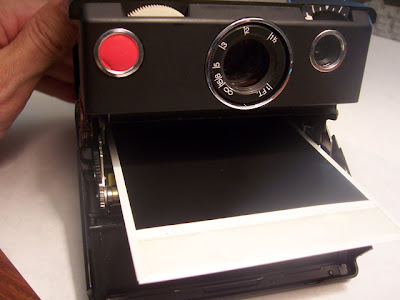
So, why mess with an SX-70 when there are cameras available that use 600 film? Beside just looking cooler, you have more control with an SX-70. The currently available One600 (and I think pretty much all 600 cameras) are autofocus (or fixed focus) with a built-in flash that always goes off. While they have their place and can be fun, generally the image is pretty straightforward with little depth of field. And it doesn't focus at less than three feet, I think, while an SX-70 lets you get six inches from your subject.
Here is a One600 shot, ripped from its plastic frame.
The autoflash makes everything a bit surreal, and the colors are more 'natural' than those taken with the SX-70. In other words, generally boring. Here is a shot taken with the One600 out in a field with a summer storm arriving...
While not horrible, it's just a bit odd looking. It has an artificial diorama feel to it because of the flash, and the closer stuff is washed out. That being said, it has its place as a 'quick! run and take a shot' camera, and also works well with expired film.
So using 600 in a 600 camera isn't all that bad. The SX-70, though, just has its own bit of magic going for it. The depth of field is amazing, allowing for incredibly soft, pretty pictures that have an otherworldly quality to them.
The shutter will also stay open for a very long time in low light situations, allowing for some interesting indoor shooting. 600 does have a tendency towards warmer, yellow tones when exposed for longer periods in low light.
So I highly recommend picking up an SX-70 if you want to enjoy 600 (and 779) film while you can.
There is one other type of SX-70 camera, the OneStep. These are kind of the precursors to the 600 models. Fixed-focus, non-folding cameras. This is perhaps the most famous model, and maybe one of the more 'recognized' Polaroid camera models. There is some variety on the color schemes for this model.
I opened it up to see what it looks like on the inside and to see if a similar mod could be done.
Other than it looking like the inside of a Dalek (sans little squishy alien), I couldn't see much I could do with it. And the plastic covering the light meter is already clear, so what do you replace it with? Clearer plastic? So the only real answer for this camera is to use real Time Zero, or get a filter. I did stick a pack of 600 in this one to see what it would do. It behaved very badly. I had to press the red button three times before it would spit out the black sheet. Then I had to press it a couple times to actually get a shot out of it. Then the shutter wouldn't open anymore. The packed worked fine when I transfered it to the SX-70. Here I am doing my best Principle Richard bull horns imitation (The Breakfast Club for the uncool out there...though I have issues with that movie and its 'you have to not be weird to fit in' message, but don't get me started on that).
That will probably be the last shot I ever take with the thing. Feel free to buy one and experiment, though. Oh, and NEVER pay more than maybe $12 for one of these things. I see people selling them for $75. They are very, very common and you can't do much with them. Other than being kind of cool looking on a shelf, they aren't that useful and aren't particularly collectible.
Always a fun site to read, check out The Branding of Polaroid. I wonder where the name SX-70 came from? It's so technical sounding. Maybe I'll email Mr. Giambarba and see if he knows. He designed the famous Polaroid rainbow. I've mentioned that in the past.
Anyway, that's all I can think of right now concerning the SX-70. On a sadder note...what will my kitties sleep on when Polaroid is gone?
Saturday, May 17, 2008
Polachrome: FAIL
About a year ago, I bought some 35mm Polachrome film. Wassat? Polaroid made a 35mm instant slide film for a few years. Really...instant 35mm film. So I was like, wow! Instant 35mm film! Gotta have some of that. So I get it in the mail, and this is what I find:
My, that's a large box. Open it up and I find:
Prettiest 35mm cartridge ever. And a funky box. And some 'instructions' that explain absolutely nothing. What's the box for? How do you develop the film? I took a trip to the ever faithful interweb and discovered I needed an 'AutoProcessor' (capital A capital P). Straight to ebay, found one for 99 cents (and $20 shipping...not really, but certainly more than the thing cost). What's an AutoProcessor? This is an AutoProcessor:
It came with this useful set of instructions in Hindi or Farsi or something.
Actually, it did have instructions in English and 20 other languages, but they weren't much more useful than the above. They kept referring to some pictures I obviously didn't have...part F slides into part B, cranking L until you feel resistance, etc. Fortunately, it didn't seem particularly complicated. Or maybe it really was. Either way, I'll go through the basic process, even though we already know the outcome of my efforts. I kind of gave away the killer's name in the title of the story. But...for future reference, and laffs.
I shot the roll of 12 in my Holga 135BC. It took me about three months to finish the roll. I didn't want to rely on it in case it didn't work, so I mostly didn't use it at all. Finally finished it in a Food Savers parking lot. Time to develop!
So, first I open up the AutoProcessor (Again, capital A capitol P, trademarked as such, I'm sure. I will probably miss a capital P some time in this essay).
And, wow, it does look like a film processor. You look at that and think, yep, that looks like it should be used to develop 35mm film or something. First thing I did was clean the gunk off of that metal plate. The 35mm processor equivalent of Polaroid rollers.
Step one, put the developer box in the AutoProcessor. This is the funny little cube that came with my film.
Pull the processing pack leader out, keeping it flat...
And attach to the pear shaped hook under the clear lid.
Yeah, I know... duh, right? Why the step by step? You'll be thanking me some day when you have your own AutoProcessor and you aren't sure if the pear shaped hole goes over the pear shaped peg (they said pear shaped...I think it's more of a teardrop, but maybe pears are happy and teardrops are sad, and we don't want our customers to be sad). And I need something to fill this article out. And it's interesting in a very low-grade way. Maybe.
So the pack is in, next comes the film roll. Place it in the part with the little film drawing on it, hook the film onto the matching pegs, close the plastic lid. Yadda yadda...yeah, I'm getting impatient, too.
Close the lid to the Autoprocessor. On one side is a big flippy bar thing. The instructions say to push it down firmly at a medium speed. At this point, I can mostly follow the pictures on the front. Though the booklet specifies speeds for each action.
Turn the knob until you feel resistance or the ratchet sounds stop, which is the end of the roll. Okay, now I have some issues with all of this. For one, once I close that lid, I have no idea what's going on. I'm twisting the knob. I never heard an end to the sounds, and I never met resistance. So I just went through the steps, waiting the 60 seconds to develop, flipped the lever back up and wound the film back in. I opened it up, and had exactly bubkis. Nada. The film is back in the spool, and the processor pack is all wound in. I pulled out the film strip and saw nothing. There was a little smudge at the beginning where it looks like the developer started to spread, and then the rest is dry and black. Now...I maybe could have saved the film, but I have no way of knowing if it is developed or not until I pull it out and look at it, exposing it to light. So I have no idea what went wrong. Too old? Or was it the processor? There is an extra random bolt in the box. I don't know if it goes in the processor or what. I think it's probably just the developer, as it's all gunky when you pull the leader out. And it smells kind of like rotten vegetables. Ugh, rancid, I just shuddered. Seriously, like green beans left in the trash. It's probably very toxic, so know that I'm not a trained professional or anything and this is probably a stupid thing to mess around with. This stuff probably causes cancer or babies or something.
That being said, let's take all this apart and see what's inside. First, I'll try processing with the lid off and see if I can tell what's going on.
Okay, trying to twist the knob like it says just makes the film rewind...so how do I make it wind forward? I'll close the lid and wind a bit and then open it up, see where it's at. After about three full turns, it is definitely winding. Flipping the lever on the side actually locks it, so I'm flipping it back up to open it.
I see it is working. See how far I can wind it...about 23 revolutions before I feel resistance (which I never felt in my previous attempt). So let's leave it for 60 seconds. Even though I won't get pictures, maybe it will develop the emulsion. Here's a picture of waiting 60 seconds.
Rewind it and see what we get. Well, there's your problem right there! You have gunk in your works. Gunk on your gunk. Looks bad, we'll have to kill it.
So the AutoProcessor works...it was just bad developer. Bummer. Before I go, I'm going to rip that developer box open and see what's inside. I should probably put on gloves or something. Nah. I'll just keep from rubbing my eyes more than once or twice during the process.
Brute force and massive muscles open the concrete-like plastic box. Ugh. Gloop. And Gunk. Let's see of the cats like the taste of it (Kidding! No angry e-mails from rabid cat lovers...even rabid cats need love). I'll just taste it myself. Mmmm...minty.
Well, that told me nuthin' about nuthin'. Always fun to pull things apart, though. That was a long post without a satisfactory finish. Where else are you going to read a blog post from some jackass bragging about his failures? Happy to oblige.
So, what does Polachrome look like when it works? Something like this. I have another roll of 36 exposures...not sure what I'm going to do with it yet. Would be nice if there was another way to develop...maybe Diafine?
Not sure what I'll talk about next. Have an urge to write about my SX-70, but we shall see. Waiting for a fancy new skin to replace my rotting brown covering (I'm not getting all Silence of the Lambs on you, I'm talking about the camera), so maybe I'll show that off when.
Subscribe to:
Posts (Atom)