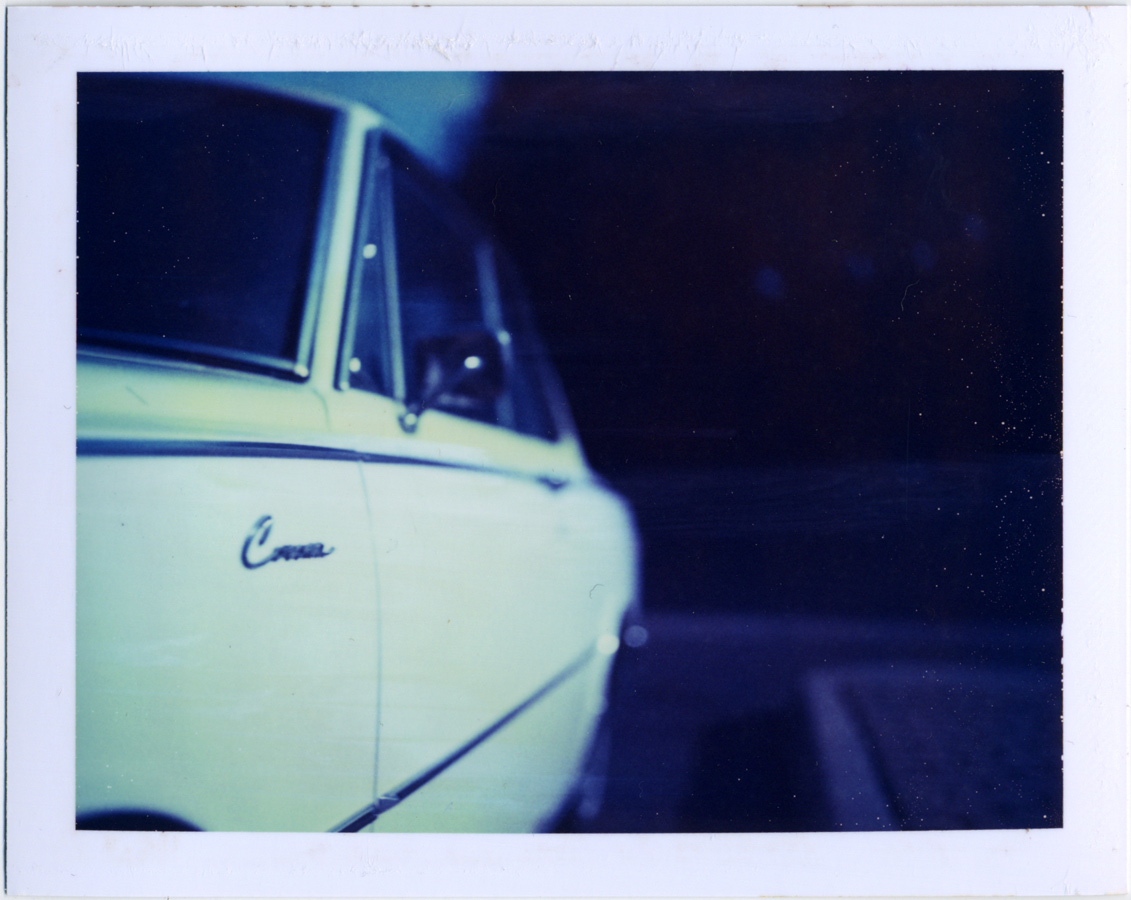
My poor Polaroid 195 has seen a lot of use and abuse. I've probably taken 2,000 shots with it (and it was already 30+ years old). A couple years ago, I kinked the cable and had to replace it, which I talked about here, and I replaced the bellows. More recently, I tripped on the dog's leash and dropped it on the sidewalk. Ever since then, it has had issues with focusing, only working sporadically. While I now mostly use my 190, it seemed kind of pointless to just let the 195 die, unused on a shelf...so I kind of started from scratch! What's old is new again, with a 195 lens fitting on to a 250 body. Many folding cameras are nearly identical in build, with the lens being the main difference, so in theory, the fronts should be swappable. I looked at various folding Polaroids, and didn't want a plastic body, and I wanted a Zeiss lens. I don't care about back timers, and a local shop had a couple 250s for cheap, so a 250 was going to sacrifice its life so my 195 might live again. Yes, I didn't even dig up the corpse of an already dead 250...he was alive and healthy, and I killed him for my project. It was worth it.
First thing to do is to remove the "good" part of the 195 (and the bad part of the 250) - the front. The body is a mess, but the front part that houses the shutter and lens was in perfect working order. This is really a simple matter of removing a screw and a bolt on the bottom, and the four screws inside that hold the bellows to the front.
First, remove the four interior screws, then the screw on the right bottom. This will leave the front swinging from the bolted post.
There are a couple small differences between the 195 and other cameras. The 190 and 195 have a small support foot on the bottom that none of the other folders have. Also unique to the 195 is the absence of a spring on the bottom. Instead it uses a piece of metal that creates resistance, similar to the resistance from the springs. You need this resistance to focus the camera. I was figuring the 195 front would work fine with the 250 spring system since the 190 uses a spring and the 195 and 190 are almost identical otherwise.
So after removing the bolt (I used a monkey wrench), the front slides off of the strut pole.
I had also had a couple issues using the 195 with light leaking in a circular shape on some prints, so I opened up the lens board and wrapped some electrical tape around the inner lens to make a better seal.
Here you can see how bent the 195 is...that bar should be parallel with the base.
I made an effort to bend everything back into place, but between the damage done when I replaced the shutter cable and dropping the camera, it was beyond repair.
And we have the head of the 195 awaiting transplant alongside the donor 250.
I took apart the 250, clipping and removing the wire that powers the meter, since the 195 doesn't have one.
The front comes off easy...just don't lose the spring!
All that is left to do is to put the 195 front onto the 250 body. I couldn't really take photos of this because it was a two-hand job, but I'll describe it quickly. First, slide the 195 front into its bar, line everything up and put the right bottom screw in, so that is holding the strut, front and under slat (the part the spring will go in). Feed the knob on the bottom strut into the hole under the camera and then attach the smaller end of the spring onto it. While holding the stretched out spring, fit the first left-hand hole over the exposed vertical bar end. Before feeding it through the second hole, you need to fit the spring end over the post, then feed the post through the second hole. Then you replace the washer and bolt! It's easier than it sounds, really...maybe a three-minute job. Then you replace the four screws that hold the bellows in place (just close the camera and it will all line up), and reattach the cable (which I forgot to mention, but you can see how it works here...just a matter of three screws and a small flathead screwdriver).
Just remember, work right to left!
In the end, we have a living, breathing 195!
This 250 has a better Zeiss finder than the 190 (and 180), with a larger viewing area (the other 250 at the shop had the smaller finder). If you are looking for Polaroid cameras with the Zeiss finder, this is something to anticipate and look for.
It's a family reunion!
Of course, I had to take some shots to test the focus...and it works beautifully! Very expired 669 and a setting sun...
Good stuff!
On a side note, I no longer have my 195 front cover because I set it down (along with a now missing print of some vintage arcade cabinets) so I could take this long exposure at this semi-abandoned ropeway station on Shikoku. I walked out without the cover and print.
Moominstein's monster lives! Argh! Grrr!
For more interesting monsters, check out Mijonju's Konica/250 beast!
Until whenever, adios!
Tuesday, February 22, 2011
Tuesday, February 08, 2011
Expired: A Photographic Exhibit
I haven't been able to think of much to blog about recently, but I do have an upcoming gallery show that I guess I should promote a bit. It is titled "Expired", and will feature about 25 peel-apart prints "in real life", meaning they will be small and ragged and beautiful for what they are...Polaroids! Here is the flyer:
And my little artist statement about the show:
Still working on the frames and some other stuff, but should be a good time when the time comes.
The show runs from March 17th to April 16th, and the opening is on March 17th from 5pm to 9pm. The gallery is at 14010 N. El Mirage Road, El Mirage, AZ. El Mirage is a community in the northwest Phoenix metro area.
View Larger Map
The building is a nice little community center looking area on the west side of the street. Contact the gallery for visiting hours outside of the opening times.
Be there or be 3 1/4" x 4 1/4"! I'll be the one with a Polaroid camera in my hand.
Soon I plan on talking about the Kowa Super 66, and I also have some TLR action happening. Another trip to Japan in a couple months, as well!
And my little artist statement about the show:
Many things come to mind when hearing the word “expired”. Death may be first and foremost for some, while others may think of milk. Expiration is inevitable for all things, living or not. Disorder comes from order, and nothing lasts forever. The American Southwest has a particularly unfriendly attitude towards so-called permanence. Extreme temperatures (sometimes low as well as high in a 24 hour period), a baking sun, dry desert winds, insects, animals…you name it, it exists here to tear down all things. As well, the Southwest is an odd mix of old, somewhat old, and the fastest-growing “new” in the country. Humans destroy the old at a rate tenfold what nature can do, and replace it with an often bland newness. Expiration is all around us, in the bare mountains, the dry desert plains, the decay of man-made and natural forms, the sun-baked storefronts with warped wood and peeling paint, the rotting automobile carcasses, and the near empty towns scattered throughout the region.
We often strive to preserve which will eventually be no more, those expired objects that surround us, and photography is one method of preservation, to create an image of what is and what was, or may soon be no more. Sean Rohde chooses to preserve the concept of expired in the Southwest with film that is also expired. More specifically, expired Polaroid instant film. Using fully manual, vintage Polaroid cameras from the 1960s and 1970s (more specifically the 180, 190, 195 and Colorpack III), he explores the deserts and towns of Arizona, California and Utah to record and preserve images of objects and places that are often gone six months after. The film he chooses includes Type 669, Type 690, and ID-UV, all color films, all expired anywhere from 1995 to 2008. Polaroid film itself is a virtually expired medium. There are those that continue in the spirit of Polaroid, but these specific Polaroid films will soon be long gone.
Sean Rohde shoots what he sees, making no changes to the environment, yet the images often display the essence of the Southwest rather than being straight shots of what is in front of the camera…a combination of film and camera choice, technique and photographic eye. The colors of red, orange and blue are present throughout the Southwest as shown in these photographs, and the colors often seem burned by our desert sun. The prints themselves are sometimes ragged and faded, which only serves to enhance the subject matter. The prints are expired objects, presenting images of expired objects, and it is worth noting that they will not last forever. They will crack and peel, curl and fade. These Polaroid prints are literal, tactile representations of the “expired” theme that is presented in the photographs. These are here to look at, these expressions of expiration…for now.
Sean Rohde has lived in Phoenix since June of 1997, having spent 27 years of his life previously in northern Indiana. Working as a registered nurse, he spends his free time shooting many analog film formats with vintage cameras. More of his work may be seen at http://www.flickr.com/photos/sjrohde and you may read his ramblings about film and camera reviews/modifications at http://moominsean.blogspot.com.
Still working on the frames and some other stuff, but should be a good time when the time comes.
The show runs from March 17th to April 16th, and the opening is on March 17th from 5pm to 9pm. The gallery is at 14010 N. El Mirage Road, El Mirage, AZ. El Mirage is a community in the northwest Phoenix metro area.
View Larger Map
The building is a nice little community center looking area on the west side of the street. Contact the gallery for visiting hours outside of the opening times.
Be there or be 3 1/4" x 4 1/4"! I'll be the one with a Polaroid camera in my hand.
Soon I plan on talking about the Kowa Super 66, and I also have some TLR action happening. Another trip to Japan in a couple months, as well!
Sunday, December 19, 2010
Konica Instant Press
No pseudo-clever title for this article. Most instant Polaroid cameras are made by Polaroid, but there are a few companies that make Polaroid compatible film cameras. I've already talked about Keystone cameras, and there are a couple of NPC cameras that are clones of the 185 and 195 (at least in name) that I haven't used. I've talked about the Moment, a Russian type 40 clone. Fuji also makes proprietary cameras, as well as the high-end, fully manual Fotorama FP-1. Kodak also made instant cameras that used Kodak instant film. There are also many cameras that use Polaroid backs, such as Mamiya, and just about every other medium format camera (and even some 35mm and large format cameras). There is one more important Polaroid peel-apart compatible camera (hint...it's mentioned in the title).
The Konica Instant Press was released in Japan in 1983, and sold outside of Japan in 1984.
This is the first fully manual Polaroid clone, created a good 10 years after the 195, followed by the Fuji FP-1 around 1995. It was originally marketed as a professional camera for proofing and for real estate, etc. It was only produced for a couple of years, 1983 and 1984, I believe, and seems to have passed under the radar for the most part. It's value was never underrated, though, and it has consistently sold for $700 to over $1000 since the mid-1990s (unless you get lucky and find a deal). It is fairly rare, though it can be found on eBay and Craigslist every so often. So...why so special?
The Konica Instant Press:
An overview from the manual...
The camera is a folder, meaning that it has bellows and that it can be folded into the body for compact storage and protection of the camera elements.
The bellows are actually the weakest part about the camera. They are much thinner than those present on the 180/190/195, and seem to be prone to wearing out (more so than the Polaroids, which get leaks along the edges). I had to tape up a line of leaks along the top of the bellows (or is it bellow, singular?).
The camera is made of both plastic and metal parts. The body is mostly plastic while the viewfinder is all metal. The pack holder is basically just a Polaroid back stuck onto the camera.
You can see that it has a tripod mount on the bottom, and this one has some exposure guides on back in Japanese, so one could assume that this camera was an import and not a domestic camera.
The camera takes all Type 100 pack films. I read in a book that it takes Type 80 as well, but this is not true. It does not have the notches that allow for the extra tabs that Type 80 packs have (to prevent the film pack from sliding back into the camera). It would be an easy mod, but not really necessary at this point with Type 80s being relatively rare (and I have plenty of other cameras that I can use for Type 80s).
It has a plastic left-hand grip, which I find to be a bit slippery, so I grabbed a Konica strap from eBay.
The Konica Instant Press features a 110mm Hexanon lens (the FP-1 has 105mm, while the 180/190/195 have 114mm lenses).
Aperture is 4 to 64 (the FP-1 is to 5.6, 190 and 195 are to 3.8, and the 180 is to 4.5). So it has the advantage of opening almost as wide as the 190/195. The aperture is also a slider, not clicking into place, so you can use apertures between the settings if desired.
Shutter speeds are from 1 to 500, with a B and T setting. This is comparable to other Polaroid manuals, except for the inclusion of a T setting, which allows you to keep the shutter open until you press the shutter button again. Neither the manual Polaroids nor the FP-1 have this setting, which is a great feature for long exposures. It also has a flash mount. Filter size is 49mm, allowing you a full range of filter and hood use. The manual Polaroid cameras seem to use a unique filter size that requires a Polaroid brand filter (UV, yellow and ND).
Firing the shutter is a two-part system, like all other manual Polaroids. You cock the shutter above the lens, and fire the shutter via a button on the cover (with the camera open, of course). The shutter button allows for timers and cables, as well (the Polaroid manuals can only use a Polaroid cable that fits over the shutter button).
Focusing is actually similar to the old Polaroid Type 40 cameras, such as the 110 series, via a knob on the side of the camera (the cover).
The Polaroid manuals' focus consists of left and right finger grips, allowing you to directly slide the bellows section in and out (this is actually the same for all automatic folders, as well), while the FP-1 has a dial for focusing. While I'm used to the Polaroid method, I find the Konica focusing allows for an amazing amount of precision. I'm not sure if the camera actually produces a sharper image, or the focusing dial is just that much more precise. It is extremely sensitive and accurate. Focusing is done through a single viewfinder, with a center circle that brings two images together until they "match", bringing the subject into focus...much the same as most focusing systems. This brings up another advantage that the Konica has over the Polaroid manuals...the Konica allows you to focus as close as 0.6 meters. This is closer than the FP-1's 0.8 meters, and much more so than the Polaroid manuals' 1.2 meters. This means the camera basically has built-in close-up ability. The precision focusing is a blessing for this close-up work, as even a slight difference in focus means a blurry subject.
The viewfinder is large and bright, and features moving guidelines within the finder depending on focus.
So the area within the guidelines is the image area. It took me a a couple shots with my subject not being in the photo before I realized this!
I was using the entire viewfinder, as one would with a Polaroid manual camera. I'm not sure if the FP-1 has the same method or it uses a full viewfinder. Once I figured out what was going on, it's really nice to have accurate frame lines, particularly when shooting close to a subject.
You can see that the camera produces a lovely image when shooting close! This was shot at 125/f11 and it is still loaded with bokeh (though some hate to use that word). A couple more shots close up...
Again, the pinpoint focusing is wonderful. It also shoots nicely from a distance.
So how does it shoot compared to other instant peel-apart cameras? This is really tough to answer. It definitely seems to produce a sharper image than most other cameras I've used, comparable to the 600SE, which can produce amazingly sharp images. This is probably a combination of the nice lens and the very accurate focusing. I attempted to (generally) take the same shot with multiple cameras and the same pack of Fuji FP-100C and the same exposure settings (f11 and 60). The framing isn't always the same, and the sun decided to peek out through the clouds while I was doing this, but it's still a somewhat interesting comparison.
Konica Instant Press
Polaroid 190
Polaroid 180
Polaroid 190 (I'm currently having issues with the focus on this camera)
Converted Polaroid 110A
Converted Gomz Moment
And one more with the Konica Instant Press
I also took a shot with the 600SE and 50mm lens, but I forgot to remove the dark slide, a definite annoyance when using that camera. And I took a shot with the Colorpack III, not realizing I had the rollers out...so I produced this vaguely amusing mess.
So, yeah, I like the Konica Instant Press a lot, and I will be using it often. It has some distinct advantages over the 190/195, and once I get the right filters and a decent hood, I think it will produce some fantastic images. Though I won't stop using my 190, the Konica will have a spot on my car seat next to it. The 600SE is a different beast altogether, so it can't really be compared to any of these cameras in terms of quality or portability, but the Konica is certainly a viable alternative to the 180/190/195 and you could easily just use the Konica and not own the others. Compared to the FP-1, I can only say from my very limited experience of having messed around with Artsyken's camera while in Japan. But I wasn't too keen on the dial focusing, which seemed a bit stiff. The Konica focuses a bit closer than the Fuji, 0.6m compared to 0.8m, and the Fuji the lens only opens to 5.6, while the Konica is 4, which seems to be a distinct advantage. Owning the Konica (and various other Polaroids), I personally don't see any reason to also own the Fuji FP-1. But it probably is a nice camera on its own.
The manual for the Konica Instant Press can be found online here.
Introducing...The Konica Instant Press!
So, when is too much...too much?
Edit from the future!
The camera was having an issue with firing the shutter. It wasn't the shutter itself, rather the mechanism between the button and the lens. I was a bit wary of taking the camera apart as it wasn't cheap and I didn't want to mess up the focus. Turned out to be pretty easy (mostly) to remove the front, and you can't mess up the focus as it is a separate mechanism in the hood of the camera. I figured I would post shots and a short explanation for those interested. Though I discovered none of this was at all necessary by the time I was done.
First step is to release the bellows, which only requires the removal of four screws from the inside.
There are two rails that hold the lens board in place. To remove the board, you remove three screws to take off one rail, and the front piece is loose.
Removing the lens is easy in concept, difficult in execution. You just need to remove the screw from the back that mounts the camera on the board. But they had three dollops of glue on the threads that made it extremely difficult to remove. I cleaned the threads while apart so it was much easier to put back together.
Under the lens, it looks like the Showa production date for the camera, or at least the lens.
So I had two problems. At first, pushing on the button didn't release the shutter. It would stop maybe 1 mm short of firing the shutter. I could reach around the front and push it all the way to fire. But then the mechanism started to bind. Before I took it all apart, I couldn't really tell what was going on. But there are basically three parts to fire the shutter. The button presses down on a bar. This bar pushes down on another part that connects with the shutter mechanism, firing the shutter.
After looking at all of this and thinking about it for awhile, the fix was actually pretty simple. The binding was fixed by pushing up on "2" (top photo) with my thumb, which bent it back into place, so it moves straight and does not catch on the surface of the board. The second fix...I actually can't figure out why the piece doesn't push down far enough. It is seriously like 1mm or less short. I tried bending it a bit, but it needs to pretty much be flat to fire at all focal lengths, as a different amount of surface makes contact depending on how close or far you focus. So I just took two small pieces of black electrical tape and made "1" slightly thicker on the bottom, so it had enough to push the proper distance. That's all it took. And I could have done all of that without taking apart the camera. Still, and interesting learning exercise.
A quick video of the shutter working properly...
Until next time!
The Konica Instant Press was released in Japan in 1983, and sold outside of Japan in 1984.
This is the first fully manual Polaroid clone, created a good 10 years after the 195, followed by the Fuji FP-1 around 1995. It was originally marketed as a professional camera for proofing and for real estate, etc. It was only produced for a couple of years, 1983 and 1984, I believe, and seems to have passed under the radar for the most part. It's value was never underrated, though, and it has consistently sold for $700 to over $1000 since the mid-1990s (unless you get lucky and find a deal). It is fairly rare, though it can be found on eBay and Craigslist every so often. So...why so special?
The Konica Instant Press:
An overview from the manual...
The camera is a folder, meaning that it has bellows and that it can be folded into the body for compact storage and protection of the camera elements.
The bellows are actually the weakest part about the camera. They are much thinner than those present on the 180/190/195, and seem to be prone to wearing out (more so than the Polaroids, which get leaks along the edges). I had to tape up a line of leaks along the top of the bellows (or is it bellow, singular?).
The camera is made of both plastic and metal parts. The body is mostly plastic while the viewfinder is all metal. The pack holder is basically just a Polaroid back stuck onto the camera.
You can see that it has a tripod mount on the bottom, and this one has some exposure guides on back in Japanese, so one could assume that this camera was an import and not a domestic camera.
The camera takes all Type 100 pack films. I read in a book that it takes Type 80 as well, but this is not true. It does not have the notches that allow for the extra tabs that Type 80 packs have (to prevent the film pack from sliding back into the camera). It would be an easy mod, but not really necessary at this point with Type 80s being relatively rare (and I have plenty of other cameras that I can use for Type 80s).
It has a plastic left-hand grip, which I find to be a bit slippery, so I grabbed a Konica strap from eBay.
The Konica Instant Press features a 110mm Hexanon lens (the FP-1 has 105mm, while the 180/190/195 have 114mm lenses).
Aperture is 4 to 64 (the FP-1 is to 5.6, 190 and 195 are to 3.8, and the 180 is to 4.5). So it has the advantage of opening almost as wide as the 190/195. The aperture is also a slider, not clicking into place, so you can use apertures between the settings if desired.
Shutter speeds are from 1 to 500, with a B and T setting. This is comparable to other Polaroid manuals, except for the inclusion of a T setting, which allows you to keep the shutter open until you press the shutter button again. Neither the manual Polaroids nor the FP-1 have this setting, which is a great feature for long exposures. It also has a flash mount. Filter size is 49mm, allowing you a full range of filter and hood use. The manual Polaroid cameras seem to use a unique filter size that requires a Polaroid brand filter (UV, yellow and ND).
Firing the shutter is a two-part system, like all other manual Polaroids. You cock the shutter above the lens, and fire the shutter via a button on the cover (with the camera open, of course). The shutter button allows for timers and cables, as well (the Polaroid manuals can only use a Polaroid cable that fits over the shutter button).
Focusing is actually similar to the old Polaroid Type 40 cameras, such as the 110 series, via a knob on the side of the camera (the cover).
The Polaroid manuals' focus consists of left and right finger grips, allowing you to directly slide the bellows section in and out (this is actually the same for all automatic folders, as well), while the FP-1 has a dial for focusing. While I'm used to the Polaroid method, I find the Konica focusing allows for an amazing amount of precision. I'm not sure if the camera actually produces a sharper image, or the focusing dial is just that much more precise. It is extremely sensitive and accurate. Focusing is done through a single viewfinder, with a center circle that brings two images together until they "match", bringing the subject into focus...much the same as most focusing systems. This brings up another advantage that the Konica has over the Polaroid manuals...the Konica allows you to focus as close as 0.6 meters. This is closer than the FP-1's 0.8 meters, and much more so than the Polaroid manuals' 1.2 meters. This means the camera basically has built-in close-up ability. The precision focusing is a blessing for this close-up work, as even a slight difference in focus means a blurry subject.
The viewfinder is large and bright, and features moving guidelines within the finder depending on focus.
So the area within the guidelines is the image area. It took me a a couple shots with my subject not being in the photo before I realized this!
I was using the entire viewfinder, as one would with a Polaroid manual camera. I'm not sure if the FP-1 has the same method or it uses a full viewfinder. Once I figured out what was going on, it's really nice to have accurate frame lines, particularly when shooting close to a subject.
You can see that the camera produces a lovely image when shooting close! This was shot at 125/f11 and it is still loaded with bokeh (though some hate to use that word). A couple more shots close up...
Again, the pinpoint focusing is wonderful. It also shoots nicely from a distance.
So how does it shoot compared to other instant peel-apart cameras? This is really tough to answer. It definitely seems to produce a sharper image than most other cameras I've used, comparable to the 600SE, which can produce amazingly sharp images. This is probably a combination of the nice lens and the very accurate focusing. I attempted to (generally) take the same shot with multiple cameras and the same pack of Fuji FP-100C and the same exposure settings (f11 and 60). The framing isn't always the same, and the sun decided to peek out through the clouds while I was doing this, but it's still a somewhat interesting comparison.
Konica Instant Press
Polaroid 190
Polaroid 180
Polaroid 190 (I'm currently having issues with the focus on this camera)
Converted Polaroid 110A
Converted Gomz Moment
And one more with the Konica Instant Press
I also took a shot with the 600SE and 50mm lens, but I forgot to remove the dark slide, a definite annoyance when using that camera. And I took a shot with the Colorpack III, not realizing I had the rollers out...so I produced this vaguely amusing mess.
So, yeah, I like the Konica Instant Press a lot, and I will be using it often. It has some distinct advantages over the 190/195, and once I get the right filters and a decent hood, I think it will produce some fantastic images. Though I won't stop using my 190, the Konica will have a spot on my car seat next to it. The 600SE is a different beast altogether, so it can't really be compared to any of these cameras in terms of quality or portability, but the Konica is certainly a viable alternative to the 180/190/195 and you could easily just use the Konica and not own the others. Compared to the FP-1, I can only say from my very limited experience of having messed around with Artsyken's camera while in Japan. But I wasn't too keen on the dial focusing, which seemed a bit stiff. The Konica focuses a bit closer than the Fuji, 0.6m compared to 0.8m, and the Fuji the lens only opens to 5.6, while the Konica is 4, which seems to be a distinct advantage. Owning the Konica (and various other Polaroids), I personally don't see any reason to also own the Fuji FP-1. But it probably is a nice camera on its own.
The manual for the Konica Instant Press can be found online here.
Introducing...The Konica Instant Press!
So, when is too much...too much?
Edit from the future!
The camera was having an issue with firing the shutter. It wasn't the shutter itself, rather the mechanism between the button and the lens. I was a bit wary of taking the camera apart as it wasn't cheap and I didn't want to mess up the focus. Turned out to be pretty easy (mostly) to remove the front, and you can't mess up the focus as it is a separate mechanism in the hood of the camera. I figured I would post shots and a short explanation for those interested. Though I discovered none of this was at all necessary by the time I was done.
First step is to release the bellows, which only requires the removal of four screws from the inside.
There are two rails that hold the lens board in place. To remove the board, you remove three screws to take off one rail, and the front piece is loose.
Removing the lens is easy in concept, difficult in execution. You just need to remove the screw from the back that mounts the camera on the board. But they had three dollops of glue on the threads that made it extremely difficult to remove. I cleaned the threads while apart so it was much easier to put back together.
Under the lens, it looks like the Showa production date for the camera, or at least the lens.
So I had two problems. At first, pushing on the button didn't release the shutter. It would stop maybe 1 mm short of firing the shutter. I could reach around the front and push it all the way to fire. But then the mechanism started to bind. Before I took it all apart, I couldn't really tell what was going on. But there are basically three parts to fire the shutter. The button presses down on a bar. This bar pushes down on another part that connects with the shutter mechanism, firing the shutter.
After looking at all of this and thinking about it for awhile, the fix was actually pretty simple. The binding was fixed by pushing up on "2" (top photo) with my thumb, which bent it back into place, so it moves straight and does not catch on the surface of the board. The second fix...I actually can't figure out why the piece doesn't push down far enough. It is seriously like 1mm or less short. I tried bending it a bit, but it needs to pretty much be flat to fire at all focal lengths, as a different amount of surface makes contact depending on how close or far you focus. So I just took two small pieces of black electrical tape and made "1" slightly thicker on the bottom, so it had enough to push the proper distance. That's all it took. And I could have done all of that without taking apart the camera. Still, and interesting learning exercise.
A quick video of the shutter working properly...
Until next time!
Subscribe to:
Posts (Atom)